
Expert Commercial Elevator Installation Services for Modern Buildings
Ever wonder how a massive commercial building efficiently moves hundreds of people every day without a hitch? Commercial elevator installation involves fitting a heavy-duty, high-capacity lift system into a reinforced shaft, integrating powerful motors and sophisticated controls to handle constant traffic. The key benefit is maximizing your building’s usability by providing smooth, rapid transport for staff, clients, and goods across multiple floors. Understanding the core installation process is the first step to ensuring your space is equipped for seamless vertical movement.
Key Considerations Before Your Next Vertical Transport Upgrade
Before upgrading your commercial elevator, prioritize a thorough traffic flow analysis to match cab size and capacity with peak usage patterns. Evaluate your building’s structural constraints—such as shaft dimensions and overhead clearance—to avoid costly modifications. Consider modernization options like destination dispatch or regenerative drives, which cut energy costs and wait times.
Replacing a single machine room component can extend lifespan by 15 years without a full cabin overhaul.
Assess existing cabling and controller compatibility to streamline integration with smart building systems. Finally, coordinate downtime with tenants and schedule phased installations to minimize disruption to daily operations.

Assessing Building Traffic Patterns and Capacity Demands
To assess traffic patterns, survey occupant movement across peak and off-peak hours, mapping origin-destination flows per floor. This data directly informs the required handling capacity, measured in passengers per five minutes—a metric that dictates car size, quantity, and speed. Peak interval analysis then determines whether existing or proposed elevator systems can serve lobby demand within a 25–30 second window, preventing bottleneck formation. Q: How do you confirm capacity demands without disrupting daily operations? A: Use non-intrusive lobby sensor logs and manual passenger counts, then model scenarios in traffic simulation software to validate performance under real-world load.
Evaluating Structural Readiness for New Equipment
Before any new elevator goes in, you’ve got to check if your building’s bones can handle it. Structural load capacity is the big one—the shaft must support the cab, rails, and machinery without sagging. A structural engineer will verify that concrete or steel reinforcements match the new system’s specs. You’ll also need to confirm that guide rail brackets can anchor securely into existing walls, and that the machine room (or elevator shaft itself for MRL models) has adequate floor strength for heavier controllers or drive units.
- Verify the shaft walls can withstand dynamic loads from multiple cars running simultaneously
- Check for sufficient headroom and pit depth as per modern equipment dimensions
- Assess if existing slab penetrations align with new hoistway and cable routing
Navigating Local Zoning and Safety Code Requirements
Before you pick a new elevator system, you’ll need to map out local zoning and safety code requirements specific to your property. Your city’s zoning board may limit where the hoistway can sit, especially if it alters a setback or affects a historic facade. Simultaneously, the local building department will enforce safety codes dictating machine-room dimensions, fire-rated shaft enclosures, and emergency phone placement. Walking both sets of rules early prevents costly redesigns later. A focused pre-installation review keeps your project moving smoothly without surprise violations.
- Check your property’s zoning overlay for elevator location restrictions.
- Verify required fire-rating materials for shaft walls and doors.
- Confirm minimum pit and overhead clearances per local safety code.
- Ensure emergency communication devices match your city’s accepted listing.

Comparing Common Types of Vertical Lift Systems
When comparing common types of vertical lift systems for commercial elevator installation, the core distinction lies between traction and hydraulic machines. Traction systems, using steel ropes over a sheave, are generally required for mid- to high-rise buildings due to superior speed and energy efficiency, while hydraulic lifts, powered by a fluid cylinder, suit low-rise applications (typically under six stops) for their lower upfront cost and simpler pit requirements. The machine-room-less (MRL) traction variant is increasingly preferred for new construction because it places the drive inside the hoistway, saving valuable floor space. Conversely, roped-hydraulic hybrids offer a middle ground, providing better travel height than standard hydraulics without the full structural load of traction, which is critical when retrofitting existing shafts where overhead clearance is limited.
Hydraulic Lifts for Low-Rise Applications
For low-rise commercial buildings, typically up to six stories, hydraulic lifts for low-rise applications offer a cost-effective installation method. These systems use a piston that directly pushes the car from below, eliminating the need for an overhead machine room. This makes them ideal for buildings with limited roof height or where a penthouse machine room is impractical. During commercial elevator installation, the hydraulic cylinder is set into a drilled hole in the ground, requiring significant excavation upfront. Users experience a smooth, quiet ride, though travel speeds are slower than traction systems. The absence of counterweights reduces structural load on the building, but hydraulic fluid maintenance and potential environmental concerns regarding leaks are practical considerations for owners.
Traction-Based Systems for High-Speed Buildings
For high-speed commercial installations, gearless traction elevators are the definitive choice, using a motor directly coupled to the drive sheave to eliminate mechanical friction. This design enables speeds exceeding 1,000 feet per minute, which hydraulic or geared systems cannot achieve. The counterweight system balances the car’s mass, drastically reducing energy consumption for tall buildings. Crucially, the absence of gear noise makes these systems preferable for upper-floor executive suites where acoustic comfort matters. Why are traction systems preferred for express zones? Because regenerative drives recapture braking energy to cut operational costs, while advanced guide rails ensure stability at high velocity without hydraulic fluid hazards.
Machine-Room-Less Innovations for Space Efficiency
Machine-room-less (MRL) systems achieve space efficiency by integrating the traction motor and controller directly into the elevator shaft, eliminating the dedicated penthouse machine room. This design reclaims up to 20% of a building’s vertical footprint, which is critical in multi-story commercial retrofits where roof space is at a premium. The compact, gearless motor mounts within the hoistway rails, requiring a shallower overhead clearance than traditional systems. This allows architects to cap the building height effectively while still optimizing usable floor count. However, all maintenance and component access must occur from the car top or pit, a trade-off for the spatial gain.
MRL innovations trade external machine room space for in-shaft component integration, maximizing rentable floor area in commercial installations.
Planning the Project Timeline and Milestones
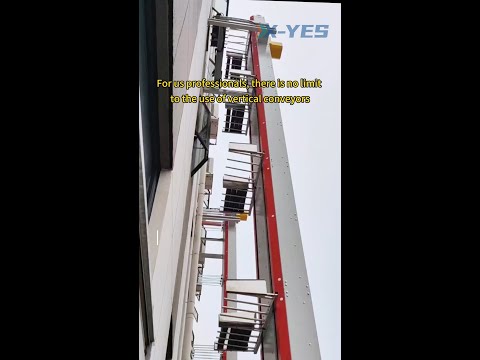
A commercial elevator installation timeline begins with a pre-installation site survey to confirm hoistway dimensions and structural readiness, which sets the critical path. Milestones include pit preparation, rail installation, and machine room equipment delivery, each with buffer days for unforeseen structural adjustments. Aligning the cab-delivery milestone with late-stage electrical rough-ins prevents costly idle time for both the elevator crew and general contractor. The final milestone, load-testing and local jurisdiction inspection, must be scheduled with a minimum two-week float to accommodate any rework on door-operator or control-wiring adjustments without delaying tenant occupancy.
Site Survey and Feasibility Studies
A site survey kicks off your commercial elevator timeline by measuring shaft dimensions, ceiling heights, and electrical access. Feasibility studies then check if your building’s concrete walls can support the hoistway or if a machine-room-less model fits the existing structural constraints. You might discover the shaft pit needs deepening by a foot, which adds two weeks to your schedule. Without these upfront checks, you’ll hit delays mid-install.
Ordering Lead Times and Custom Fabrication
Ordering lead times for commercial elevators hinge on custom fabrication requirements, which impose fixed, non-negotiable production windows. Standard cabs ship in 8–12 weeks, but bespoke finishes or non-standard dimensions extend fabrication to 14–20 weeks. Sequence the procurement process:
- Finalize architectural drawings to lock cab dimensions and fixture placements.
- Submit approved cut sheets to the manufacturer for structural steel and hoistway components.
- Place raw material orders for proprietary parts, such as custom controllers or hydraulic cylinders, which add 4–6 weeks to the baseline schedule.
Delays in sign-off or material availability cascade directly into milestone shifts, making early order placement critical for keeping the installation timeline intact.
Coordinating with General Contractors and Architects
Coordinating with general contractors and architects ensures the elevator installation timeline aligns with the building’s structural milestones. The general contractor controls site readiness, while architects verify that the hoistway dimensions and pit depths match the approved plans. Integrated schedule alignment prevents delays when concrete work or steel framing must occur before the elevator equipment arrives. The architect must approve rough-in locations for electrical and hydraulic lines early.
- Align the elevator delivery date with the contractor’s structural closure phase.
- Confirm architect sign-off on hoistway tolerances before any concrete is poured.
- Coordinate with the contractor for crane or rigging access during core drilling.
Budgeting for a New Lift System Investment
Budgeting for a new lift system investment in commercial elevator installation must account for equipment procurement, structural modifications to the shaft, and installation labor. The base cost varies significantly with travel height, capacity, and drive type, with hydraulic systems being cheaper for low-rise buildings and traction machines required for taller structures. You must allocate funds for pit and overhead clearance preparation, which can require concrete work and steel supports. Additional budget line items include electrical service upgrades, control wiring, cab interior finishes, and safety testing. A contingency of 10–15% of the total is essential for unforeseen structural issues during modernization. Securing multiple itemized quotes allows comparison of warranty periods and service packages, directly affecting long-term operational costs.
Initial Equipment Costs Versus Long-Term Operational Savings
Choosing a lift system based solely on the lowest initial equipment cost often leads to higher expenses over time. While premium components like regenerative drives or energy-efficient motors increase upfront capital, they drastically cut utility bills and maintenance frequency. Assess total cost of ownership before committing. To balance budgets, follow this sequence:
- Compare standard versus high-efficiency drive packages for projected electricity use.
- Factor annual service contract estimates, as cheaper units often demand more repairs.
- Calculate the break-even point where operational savings offset the higher initial investment.
Opting for durable, efficient equipment preserves budget for decades.
Factoring in Electrical and Structural Modifications
When planning your budget, don’t forget that core structural and electrical retrofits often cost more than the elevator itself. First, you’ll need an engineer to assess if the shaft requires steel reinforcements or concrete jackhammering to fit the new cab. Next, a licensed electrician must verify the building’s main panel can supply the motor’s voltage, or you’ll pay for a new dedicated feeder line. Even small shifts in floor-to-floor heights might force custom pit deepening, which involves waterproofing and shoring. Finally, factor in running new conduit for the controller and emergency phone line. These upgrades directly impact your total lift-system investment.
Hidden Expenses: Permits, Inspections, and Insurance
Beyond the elevator unit itself, **permits and inspection fees** are non-negotiable costs that can add thousands to your budget. Municipalities charge for plan reviews, structural checks, and final load testing, often with separate fire safety and accessibility inspection requirements. Insurance also spikes; you typically need general liability, workers’ compensation, and completed operations coverage. Policies may require a rider for elevator-specific risks, raising premiums unexpectedly. Always verify your municipality’s fee schedule before locking your budget.
Q: Can these hidden expenses be waived? A: Almost never—permits and insurance are legally required for installation approval. Skipping them risks fines, project shutdowns, and voided warranties.
Selecting the Right Vendor and Installation Team
When selecting the right vendor and installation team for a commercial elevator installation, prioritize firms with a dedicated in-house crew rather than subcontractors. Request a detailed project timeline specifying milestones for shaft preparation, cabling, and final load testing. Evaluate their experience with your specific elevator type—machine-room-less (MRL) versus hydraulic—as each requires distinct structural tolerances and wiring protocols. A reliable vendor provides a single point of contact for coordination with your general contractor and building management. Insist on a pre-installation site survey to verify pit dimensions, overhead clearance, and existing electrical capacity. This prevents costly field modifications and ensures the installation team can adhere to your construction schedule without delays.
Reviewing Certifications and Industry Experience
When selecting a vendor, rigorously reviewing their certifications and industry experience ensures the installation team can handle complex commercial systems. Demand proof of manufacturer-specific credentials, proving they’ve passed rigorous training on your elevator model. Prioritize teams with at least a decade of real-world project history, not just generic elevator work. Verifiable track records of successful commercial installations separate experts from amateurs. Q: How can I verify a vendor’s experience is genuine? A: Ask for client references and completed project lists specifically for commercial elevators similar to your job, then call those references to confirm the work and timeline.
Requesting Detailed Proposals and References
Requesting detailed proposals ensures you receive a comprehensive scope of work for your commercial elevator installation. Each proposal must itemize equipment specifications, cab finishes, load capacities, and door configurations, with explicit timelines for permits, fabrication, and installation. Mandate three recent client references from similar commercial projects, specifically targeting buildings with comparable traffic patterns or tonnage. Contact these references to verify the vendor’s adherence to deadlines, responsiveness to site issues, and final system performance. A proposal lacking technical breakdowns or offering vague references suggests hidden costs or inexperience.
Q: What is the most critical element to verify in a detailed proposal?
A: Confirm the proposal lists exact manufacturer model numbers for all mechanical components to prevent unapproved substitutions.
Understanding Warranty and Post-Installation Support
When picking your vendor, ask for a crystal-clear breakdown of what the warranty covers versus what it doesn’t—like labor, parts, or travel fees for fixes. A solid plan includes guaranteed response times for breakdowns, not just a vague promise. Post-installation support should involve a dedicated contact for tune-ups and software updates during the first year. Confirm they stock common replacement parts locally, so you’re not waiting weeks. A good team offers proactive check-ins, not just emergency calls.
| Warranty Aspect | What to Clarify |
|---|---|
| Parts vs. labor | Ask if both are covered, or if installation labor voids the warranty |
| Response time | Get promised hours for emergency fixes (e.g., 4-hour vs. next day) |
| Exclusions | Verify if normal wear, misuse, or third-party adjustments void coverage |

Steps Involved in the Site Preparation Phase
The site preparation phase for commercial elevator installation begins with a detailed survey to confirm the hoistway dimensions are within tolerance. Structural reinforcement is often required to support the elevator’s load, including installing a reinforced concrete pit with proper drainage. Electricians then run dedicated power lines to the machine room or controller cabinet, while plumbers may pre-install sump pumps in the pit. Temporary shoring protects the open shaft during construction, and all debris is cleared to maintain a clean worksite. Finally, precise anchor points are marked for guide rails and machine beams, ensuring alignment for the subsequent installation phase.
Shoring and Excavation for New Shafts
For a new commercial elevator shaft, shoring and excavation for new shafts kicks off the site prep. You’ll first stabilize the ground with sheet piling or soldier beams to prevent collapse. Then, the actual dig begins, carefully removing soil to the exact depth and dimensions for the elevator pit. This ensures the future shaft sits on solid, undisturbed earth, avoiding any shifting or settling later on.

Running Dedicated Power and Control Cabling
Running dedicated power and control cabling begins after the hoistway and machine room rough-ins are complete. Install a separate, fused disconnect from the main distribution panel to the elevator controller, sized per the motor and brake specifications. Control cabling, typically shielded twisted-pair or fiber optic, is then pulled from the controller to each shaft landing junction box for signal transmission. The sequence is: first, route the main power feeder through rigid conduit to the controller location; second, lay the traveling cable via the hoistway PVC or metal raceway; third, terminate all control wires at the local junction boxes and the main controller panel, ensuring no cross-talk or voltage drop.
Installing Pit Buffers and Guide Rails
With the pit floor set, the crew anchors heavy-duty oil or spring buffers precisely beneath the car and counterweight. Each buffer is bolted into the concrete using expansion anchors rated for seismic loads. Simultaneously, vertical steel guide rails are plumbed and aligned along the hoistway walls, their fishplates and clip brackets fastened to the embedment channels. The gaps between rail sections are shimmed to 1/16-inch tolerance, ensuring the elevator car glides without vibration during high-speed travel.
Buffers arrest the cab at the bottom of travel; guide rails stabilize its entire vertical path.
Managing Disruptions During Active Work
In commercial elevator installation, managing disruptions during active work demands a sequenced shutdown protocol. Before any rail or door work begins, you must isolate the controller and lock out the mainline disconnect, then tag the entrances on every floor to prevent passengers from prying open hoistway doors. A key insight:
Schedule all welding, grinding, or drilling during the same window to avoid repeated start-stop cycles that degrade alignment.
Coordinate steel finishes with the general contractor so that concrete pours and ceiling grids are complete before you pull rails; wet trades halt hoistway access for days. Maintain a dedicated “disruption log” next to the controller, noting every power-down and its cause—this prevents rework when commissioning is delayed by an unplanned elevator restart.
Creating Temporary Pedestrian and Vehicle Detours
During commercial elevator installation, creating temporary pedestrian and vehicle detours requires mapping alternate pathways that bypass hoistway openings and equipment staging zones. Pedestrian routes must be barricaded with rigid fencing and marked with high-visibility signs indicating the detour direction and estimated walk time. Vehicle access points receive concrete barriers or delineators to prevent encroachment into the work envelope, with signage specifying load limits and speed reductions. All detours integrate temporary lighting if they intersect with active loading docks or parking structures, and pavement markings EKCNE are applied to guide drivers through single-lane chokepoints. These detours remain dynamic, shifting weekly as installation phases progress.
Temporary detours isolate pedestrian and vehicle flows from active installation hazards, using physical barriers and clear signage to maintain safe circulation around the elevator hoistway and staging areas.
Scheduling Work Hours to Minimize Business Interference
Scheduling work hours to minimize business interference requires mapping installation tasks against tenant traffic patterns. Hoistway preparation and cabling are confined to overnight shifts when footfall is lowest, while quiet finishing work like cab assembly occurs during early mornings. Critical noise-producing operations, such as core drilling, are blocked into single weekend windows. This segmentation ensures that loud or obstructive phases never overlap with peak retail or office hours. Synchronizing deliveries with off-peak times further prevents loading docks from being blocked during client receiving hours.
Scheduling work hours to minimize business interference hinges on isolating high-disruption tasks to low-traffic periods, aligning each installation phase with the building’s quietest operational windows.
Communicating with Tenants and Facility Managers
Proactive communication with tenants and facility managers is critical to minimizing friction during active elevator installation. Provide a detailed timeline of service outages, including specific dates for shaft door lockouts and cab removal. Direct facility managers to a single point of contact for urgent questions, ensuring they can relay updates to tenants. Use digital signage in lobbies and corridor notices to announce noise windows for welding or jacking operations. Hold a brief pre-work meeting each Monday to align on the week’s disruptive activities, such as hoistway debris removal or false car setup. Clear escalation protocols for emergency access prevent tenant complaints from stalling the project.
- Deliver a weekly email brief to facility managers listing exact days and times of elevator shutdowns
- Post temporary QR code signs on lobby walls linking to a live disruption calendar
- Notify tenants 48 hours in advance for any work requiring corridor barrier erection
Testing, Commissioning, and Final Approval
After mechanical and electrical installation, testing begins by verifying each safety device, from the governor to the door interlocks, while running the car empty through every landing. Commissioning then tunes the controller parameters, adjusting acceleration and leveling accuracy to prevent jarring stops. Load testing must confirm the car holds its rated capacity without slippage or excessive deflection. Final approval hinges on a witnessed demonstration of all firefighter recall sequences and emergency phone functionality. Note that a single intermittent fault in the landing system, even during quiet hours, often delays sign-off longer than any major component failure. Only when the inspection log shows zero logged errors over 100 consecutive cycles will the elevator be handed over for public use.
Load Testing and Emergency Brake Verification
Load testing confirms the elevator’s capacity by applying a calculated weight, typically 125% of rated load, to verify hoist cable tension and structural integrity without mechanical failure. Emergency brake verification follows, where the car is intentionally moved at overspeed to trigger the governor and safety gear, ensuring instantaneous mechanical stopping. This sequence validates the critical safety and weight tolerance by subjecting the braking system to maximum kinetic energy absorption, preventing free-fall scenarios. Successful completion of both tests is non-negotiable before final commissioning proceeds, as they directly confirm the system’s ability to arrest a fully loaded car under fault conditions.
Adjusting Door Sensors and Leveling Accuracy
During final approval, precision door sensor calibration is non-negotiable for safe and efficient operation. First, adjust the infrared light curtain or laser sensor thresholds to ensure they detect a 1‑inch obstacle at floor level without nuisance tripping from dust or vibration. Next, fine‑tune the door reopening force to meet code limits—typically under 30 pounds. For leveling accuracy, set the car’s final approach speed to under 3 inches per second, then micro‑adjust the guide shoe pressure to achieve a ±¼‑inch threshold at every landing. An improper level can cause tripping hazards or rolling loads.
- Test door reopening by placing a thin, rigid object in the door path at three heights.
- Verify leveling with a digital gauge at each floor after a full‑speed run.
- Re‑check both adjustments after 20 consecutive cycles to confirm stability.
Obtaining Certificate of Occupancy and Government Sign-Off
The elevator’s mechanical and performance testing is merely a prelude; the true finish line is securing the final Certificate of Occupancy. This official sign-off from the local building department confirms the entire commercial elevator installation meets all safety codes for public use. You cannot legally open the building for business without this document. Even a minor sensor misalignment logged during final inspection can delay your CO for weeks, not days.
- Submit all load test reports and fire-rating certifications to the city inspector before their visit.
- Ensure the machine room and hoistway are fully sealed and free of construction debris for the walkthrough.
- Have the elevator mechanic on-site with the final acceptance test plan to answer inspector questions immediately.
Long-Term Maintenance Strategies for Reliability
Long-term reliability in commercial elevator installation is secured through a predictive maintenance framework that analyzes motor vibration and bearing temperature trends to preempt component wear. Proactive replacement of sheave ropes and guide shoes at 80% of their service life prevents cascading failures. Adjusting door operator tension seasonally can extend actuator life by years, yet it is often overlooked. Consistent lubrication of rail splices and hydraulic buffers, alongside annual controller firmware recalibration, ensures peak performance. This strategy eliminates reactive repairs, guaranteeing uptime that directly supports a building’s operational demands.
Daily Operational Checks for Building Staff
Daily operational checks for building staff keep your new commercial elevator running smoothly. Each morning, listen for unusual grinding or squeaking and verify the doors open and close fully. Check that the hall lanterns and chimes activate correctly. Log any minor vibrations or leveling issues immediately; these small anomalies often signal wear that is easily fixed early. Also test the emergency phone for a clear connection. Q: How long should a daily check take? About five minutes per cab—it prevents small quirks from turning into costly repairs before your weekly maintenance visit.
Scheduling Preventive Tune-Ups and Lubrication
Scheduling preventive tune-ups and lubrication for commercial elevator installation requires a fixed cadence based on calculated usage, typically quarterly for standard service. Each tune-up focuses on calibrating door operators, adjusting governor tension, and checking controller relays. Lubrication must follow manufacturer specifications: apply lithium-based grease to guide rails and use non-detergent oil for hydraulic rams. Over-lubrication attracts debris, so precise metering is critical. Keeping a digital log of viscosity changes and wear patterns ensures the schedule adapts to component degradation before failure occurs, directly extending equipment life.
Upgrading Controllers and Energy-Efficient Motors
Upgrading to a programmable logic controller (PLC) or a microprocessor-based system is a pivotal long-term strategy that eliminates mechanical relay failures and enables precision floor leveling. For energy-efficient motors, replacing older induction units with permanent magnet synchronous motors directly cuts power consumption by up to 40% while reducing heat load on the machine room. The practical sequence for this retrofit includes:
- Audit existing controller logic to map wiring to the new digital interface.
- Decouple the existing AC motor and install a compatible gearless permanent magnet motor.
- Configure the controller’s regenerative drive to capture braking energy for reuse.
This integrated upgrade pays for itself within three to five years through lowered utility bills and fewer callbacks for alignment issues. The result is a smoother, quieter ride with predictable maintenance intervals.